
Wafer paper continues to gain popularity in cake decorating because of its low ticket price and ease of use for beginner and professional cake decorators. The trouble is that it comes in one color: white. While white is lovely for many projects it is often desirable to have other colors for your decorating repertoire. Some decorators color wafer paper by printing on it with food safe ink from a printer; but not all of us have access to such a printer or the cash to shell out for one. Thinking there had to be a better solution I came up with a way to color this medium for less.
Let’s get started coloring wafer paper for flower petals and other cake and cupcake decorations!
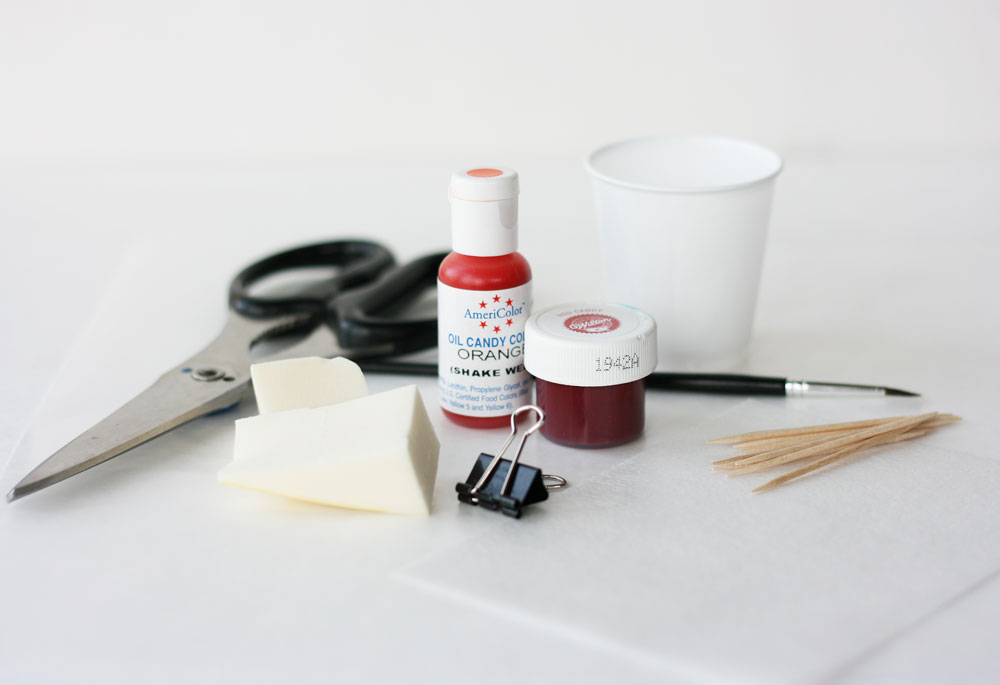 Here are the supplies you will need.
- wafer paper
- scissors
- cosmetic sponges
- binder clips
- candy food coloring (Wilton Candy Red and Americolor Oil Candy Color Orange used here). Candy color is essential because it is oil, not water based and therefore will not melt the wafer paper.
- toothpicks
- small container of water
- small paint brush
- wax paper


1. Start by preparing your wafer paper shapes. Here I hand drew petals on the wafer paper then cut them out with scissors.

2. Drop desired color of candy color on a piece of wax paper. Here is used red and a combination of orange and red mixed together and then straight red to create color gradient. If mixing colors use a toothpick to blend them together.

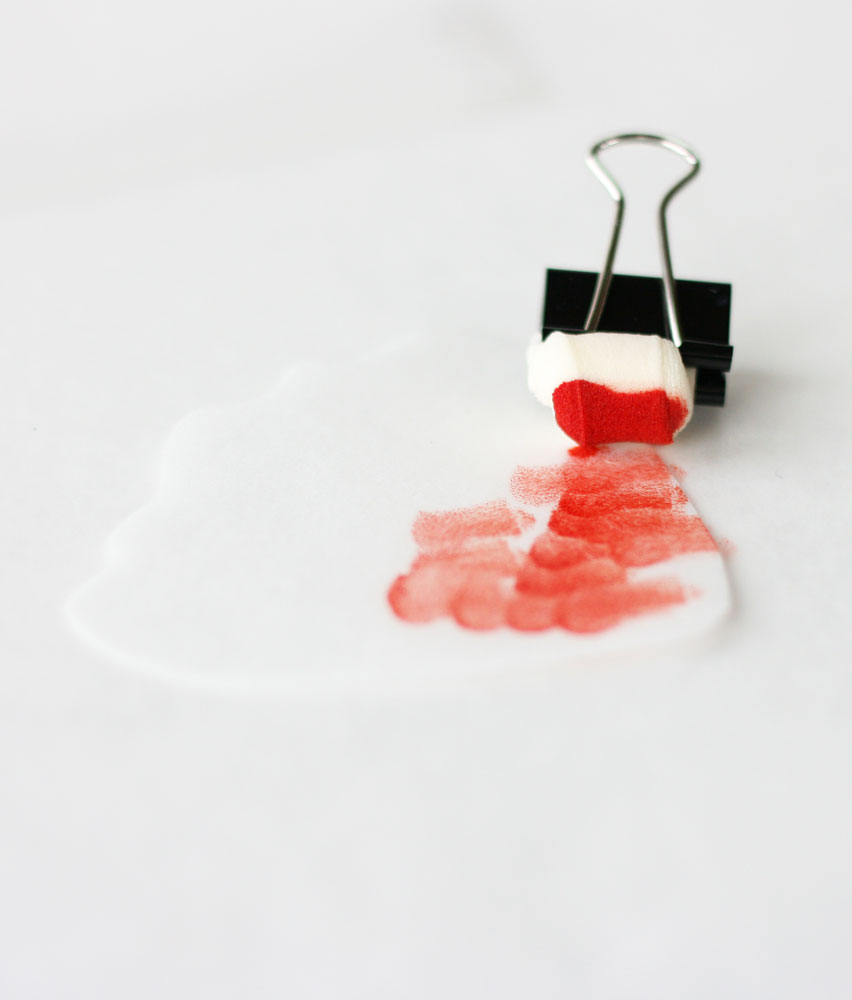
3. Make a sponge dauber. Cut cosmetic sponges into small pieces then fold and clip with binder clip.

4. Pick up color. Dip dauber into color and then tamp 15-20 times to ensure even distribution of color on the sponge.
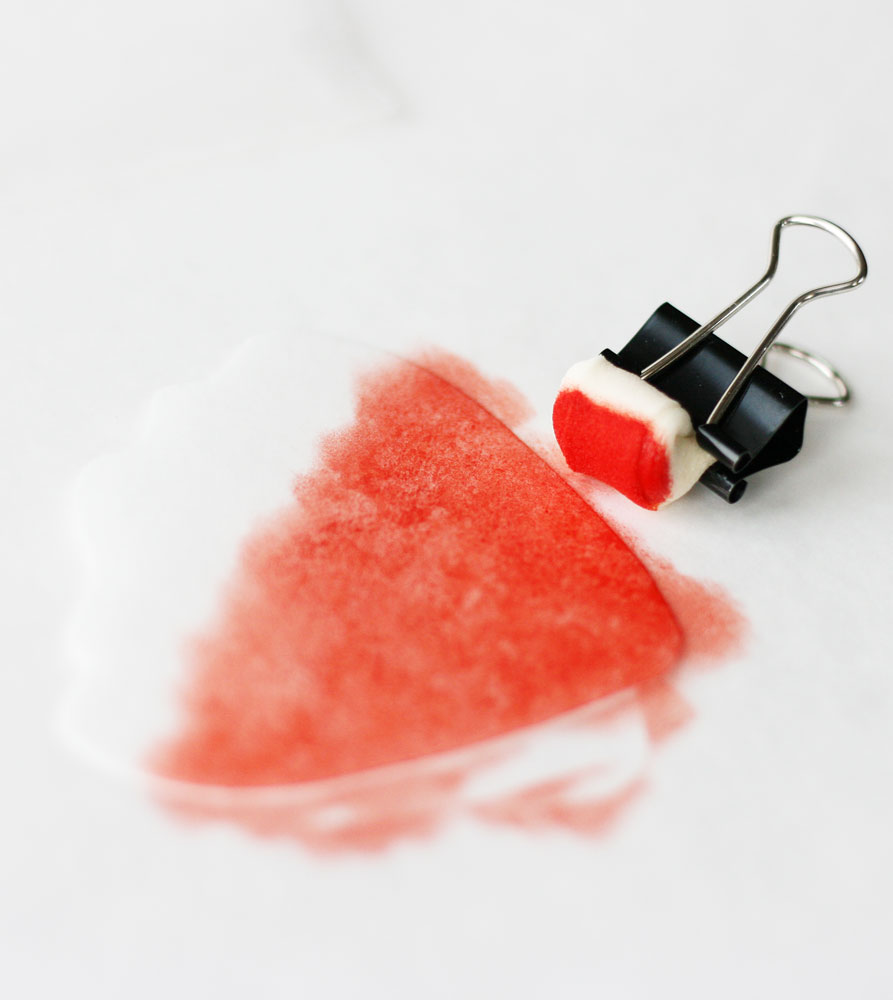
5. Apply color to wafer paper. Start dabbing the first color onto the smooth side of the wafer paper petal with a light touch. Here I used a combination of two drops orange and one drop red. You will get the most even color if you add it lightly and gradually build the color up. Keep sponging until the color is even. Here I stopped 3/4 of the way up the petal so I could add a darker color at the petal tips.

6. Add additional colors. To add gradient and shading apply a second darker color to the wafer paper. Let the petals sit for a couple of hours or overnight to absorb the color (they don’t exactly dry since it is oil color). Alternately you can use them immediately just try not to touch the petal surface.

7. Shape petals. Here I clipped a small line with scissors up from the bottom center of the petal. Then I applied a small amount of water with a damp paintbrush and crossed the petal over itself to create a cupped shape.
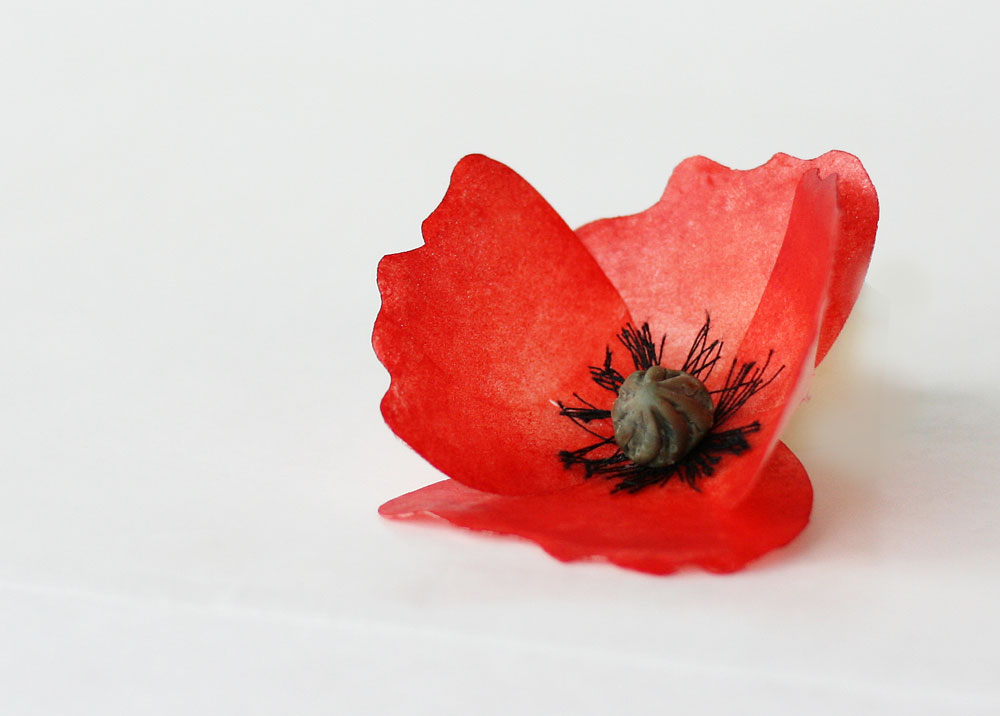
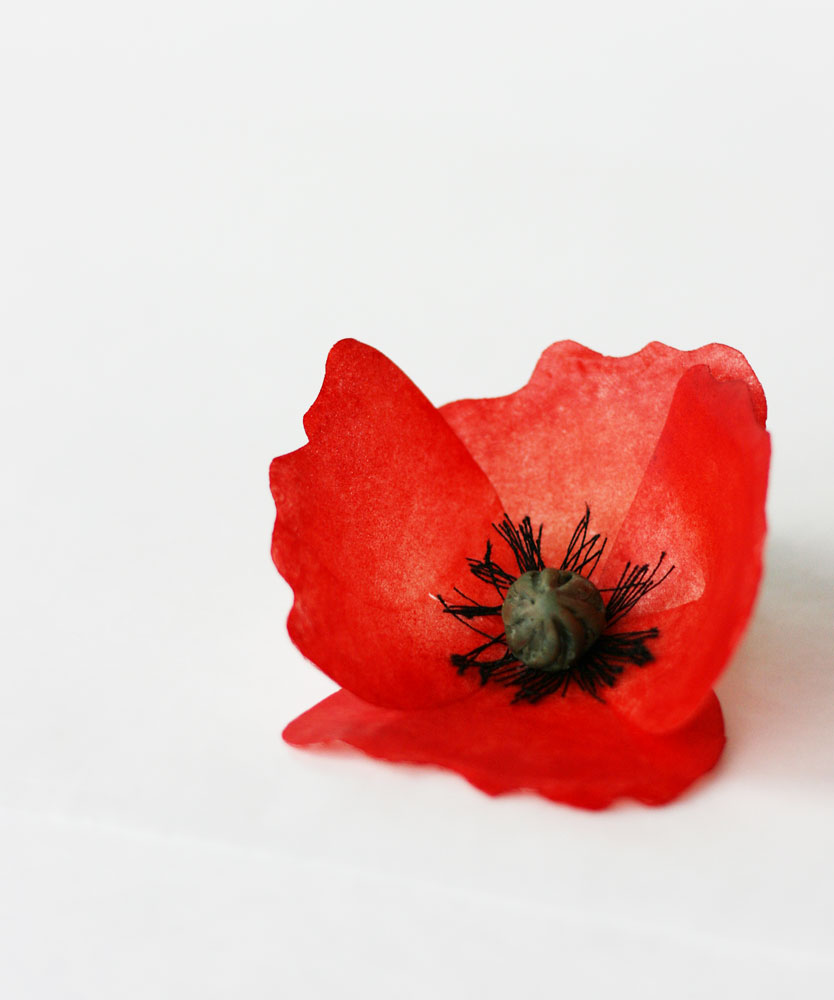
8. Layer your petals. Layer the petals together using very small amounts of water to adhere. For the poppy I add a center of black thread and modeling chocolate.

Here is a chart of how different brands and mixes color onto water paper. The top is Americolor Candy Colors followed by Wilton Candy Color, Ateco Soft Gel Colors mixed with Flowcoat (3 drops Flow coat to 1 drop gel color) and on the bottom Wilton White Food Color mixed with candy color (1 to 1). Mixing the white with the candy color makes lovely opaque pastels.
Try this wafer paper coloring technique out and let me know what you think!
Amazing!
NEAT!
Awesome technique! I am going to try this ASAP! Thanks so much for sharing!! 🙂
Thank you! This helps me a lot! I was wondering why it scrunched up so much when I painted with regular Americolor and vodka. So I used dusting poweder. I have not seen the oil based Americolor so I will start looking around! Great tutorial! Thanks again!
Here is a link to some on Amazon http://www.amazon.com/Americolor-Candy-0-65-each-bottle/dp/B00FIPAKVQ/ref=sr_1_6?ie=UTF8&qid=1394237305&sr=8-6&keywords=Candy+color++food+coloring I don’t think I paid quite this much for mine so you may be able to find some in your area for a better price. The Wilton ones work very well too and you can find them at any Michael’s store and use one of their coupons. Best of luck!
Thank you so much for this tutorial. I have great admiration for people who share their knowledge for free so others can learn and use for whatever purpose. FYI: I find Amazon to be very expensive and avoid them unless ABSOLUTELY necessary!
Thanks I gonna try it today because I love the flowers of wafer paper but I LOVE colors to. Thanks for sharing!
Awesome! good luck!
waaah!!! thank you so so much!! Will definitely try this!! Tight hugs!!!
This is awesome. I was about to make some flowers and was contemplating airbrushing them cos yes you are right – most of us don’t have printers. Thanks!!!
Brilliant!!!! 🙂 Thank You!!!
It’s A brilliant idea! Tested it out. It was so easy and my flower came out beautifully! Thank you!!
Wonderful Mary!
Great idea! Love the “low tech” method for teaching a class.
Have you considered trying Everclear & food coloring in an airbrush? Quick and easy and fast drying because of it being alcohol based. Give it a try!
An airbrush is a great option to color the wafer paper. I just don’t happen to have one! For those that do that is a great choice. Thanks for the suggestion! 🙂
Hi Mumsie
Like your comment. What kind of food coloring do you use?
Thanks!
Beautiful!!! Is there a mold for the centre?
Thank you! I just made a small cone and used tweezers to pinch the lines out in a twisted pattern. 🙂
Thank you so much for sharing this technique!
I could hug your neck!!! I’m so (SO) excited to try this. I have a hot mess going on in my kitchen trying to figure out how to color some to put on fall cookies! It’s midnight, I may have to try before I go to bed!!! THANK YOU!!!
I hope they came out beautifully!
What is flowcoat and where did you get it? Thanks so much for this super helpful post!!!
Thank you so much for sharing! 🙂
Hi Summer, I was wondering does the wafer paper absorb all of the oil or does it leave a smudges on on your fondant when you manipulate it?
For the most part it absorbs and “dries”. You probably would not want to rub the surface extensively on the surface of light colored fondant but with a little care you should be just fine. 🙂
Hi! Can you make an entire cake with wafer paper? Can you put in the fridge then? It’s stable for this?
I need to do something like this amazing Maggie Austin feathers cake:
https://apis.xogrp.com/media-api/images/9b3e67ae-1a4c-4d9a-8b11-5b1e66124593~rs_768.h?quality=75
Thank you xxx
Hi Carolanne, You can cover the whole thing in wafer paper but it is easily subject to issues with mousture. Even a little will cause wafer paper to curl up. I think in the fridge you may have mousture issues. I would leave the cake out once you add the wafer paper. Just the condensation would ruin the effect.
Love this tutorial, thank you! I was wondering, you said it never really dries all the way, but will it get to the point that the paper can be handledone without your fingers smudging the color off? If so, how long does that take?
Overnight is a good bet but a few hours at least I would say.
Beautiful. Could you use a brush instead of sponge?
Hi Bahar! You can but the brush strikes are visible. It depends on the project if that matters or not. I guess in some cases it would be desirable!
Beautiful. I want to try this. Thanks much.